Why make your own homemade costume makeup?
If you’ve been following my blog for a while, you’ll already know that my main reason for making something yourself is so that you can control the ingredients.
In a study done in 2016, it was found that there was widespread use of toxic chemicals in costume makeup targeted for kid’s Halloween costumes. Almost half were found to have at least traces of one heavy metal, but some were found to have as many as 4.
They found heavy metals like lead, mercury, arsenic, and cadmium, and volatile organic compounds like styrene or toluene (that have been linked to cancer). Lead is a neurotoxicant, and cadmium is a hormone disruptor. Neither is something that I want in a makeup that I’m using on my son.
While my main reason for making a homemade costume makeup is to have full control of what goes into the makeup I’m using on my son, I also have to admit that it’s a fun project. Older kids can help you make their own makeup and can customize it to whatever colors they need for their costumes.
Watch how easy it is to make your own Halloween makeup
How to make your own makeup
You’ll need:
- Beeswax (or candelilla wax)
- Sunflower oil (or other liquid oil of choice)
- Bentonite clay (or other colored clay)
- Pigment (activated charcoal, titanium dioxide, micas, iron oxides, etc.)
- Magnesium stearate (optional)
See notes about choosing your ingredients below
Instructions:
- in a double boiler, heat the beeswax and oil together until the wax has fully melted.
- Add in the clay, magnesium stearate, and natural colorants. Start with around 1/8th of a teaspoon of the colorant, and add more as needed.
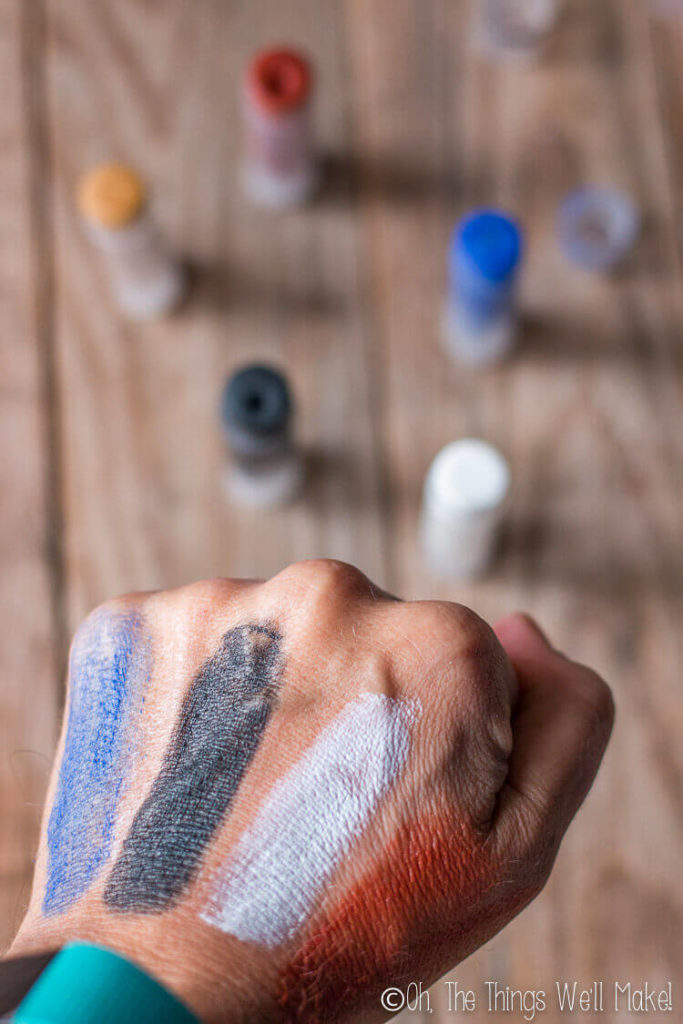
- Test out the color by applying some of the mixture to your skin.
- Add more pigments, as needed, until you reach the desired color and consistency.
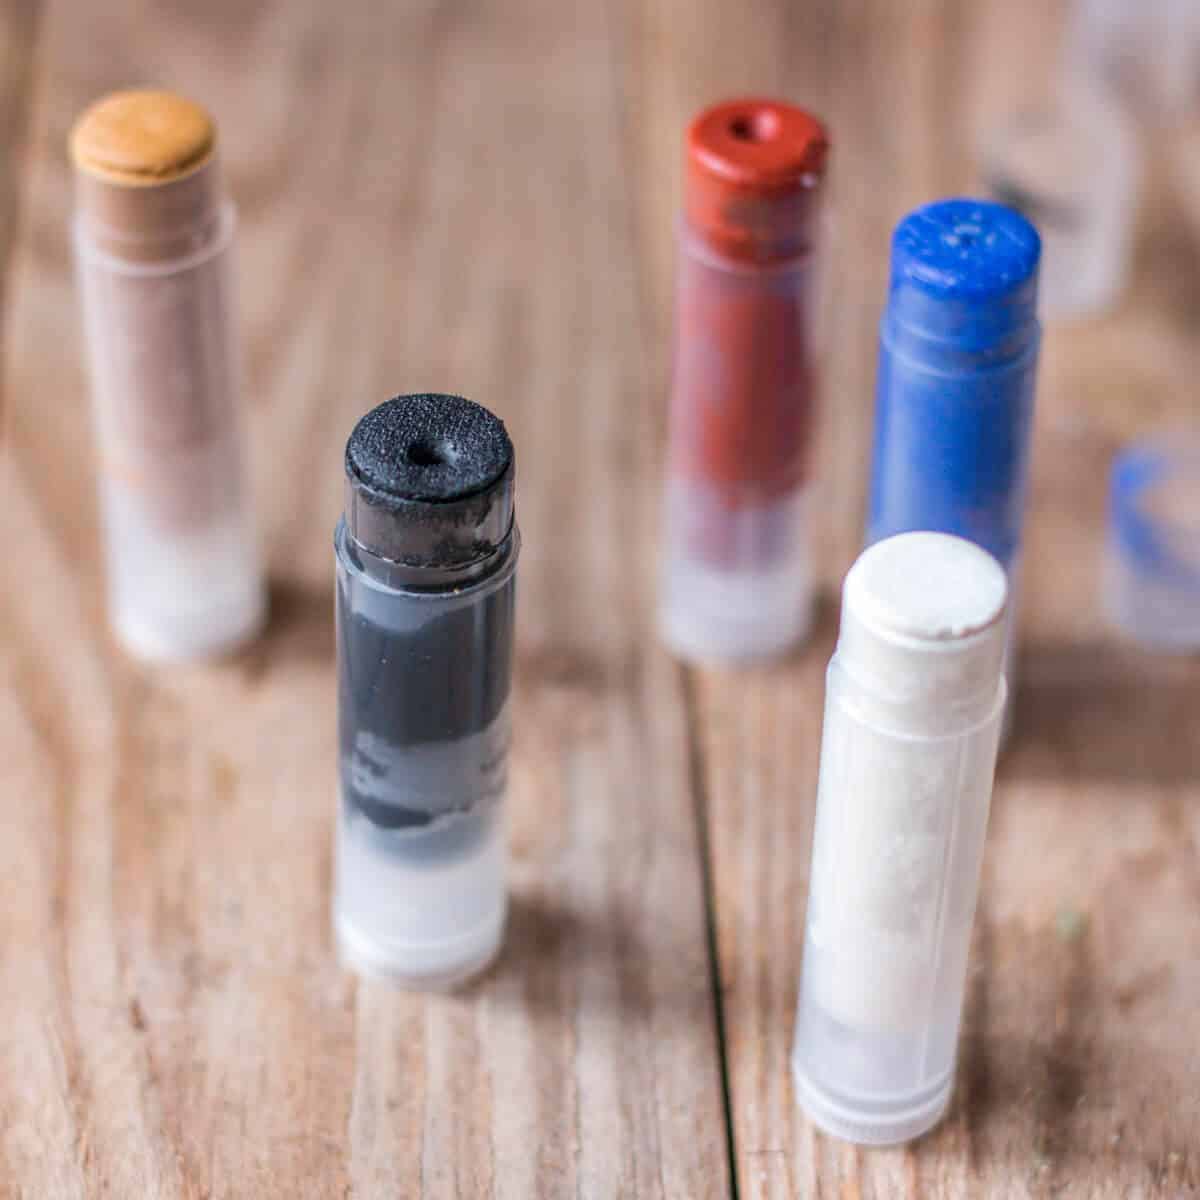
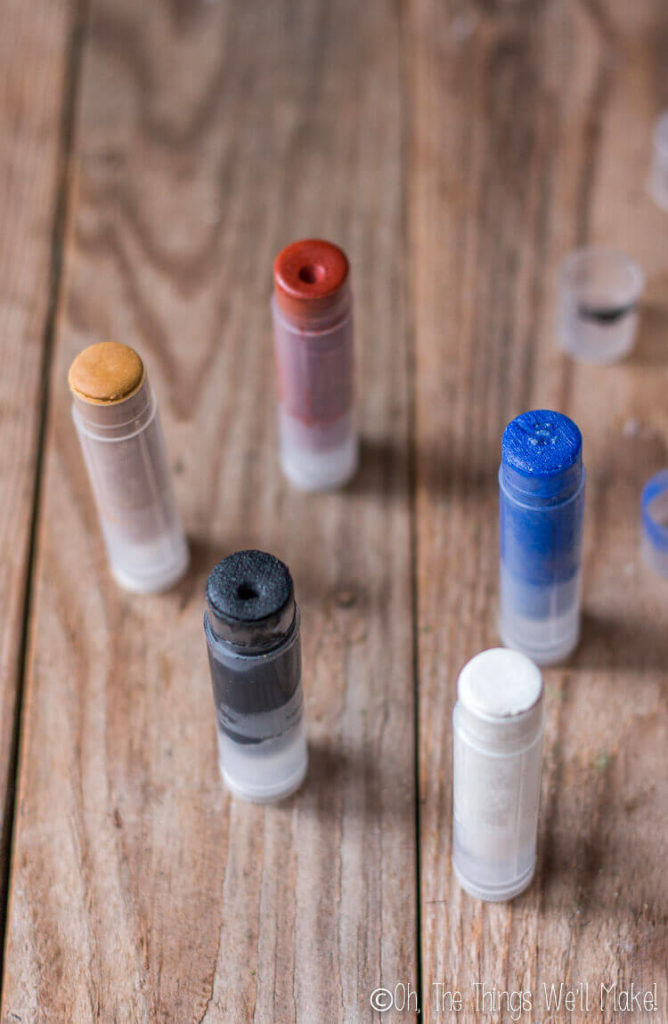
- Pour the mixture into your storage containers. (I use empty chapstick or lipstick tubes for easy application.)
- Allow to cool and harden before using.
Customizing your homemade costume makeup
Why use clay? Which are best?
My first attempts at making a homemade costume makeup ended up in a shiny, greasy-looking makeup. With some colors like black, it really didn’t look too bad, and the makeup spread pretty easily.
After doing some more experimentation, though, I found that adding in some bentonite clay allowed for a more opaque and less shiny makeup that more easily spread on the skin. Adding the clay helped give better coverage without needing to add as many colorants.
I tried using other clays like kaolin clay when making white makeup and red clay when making a red makeup stick. Colored clays work relatively well for coloring the makeup, but I prefer the texture that bentonite clay gives the makeup.
You can use other clays in elaborating the makeup.
- I used white kaolin clay to make a bright white makeup stick.
- In most cases, I preferred using bentonite clay along with other pigments.
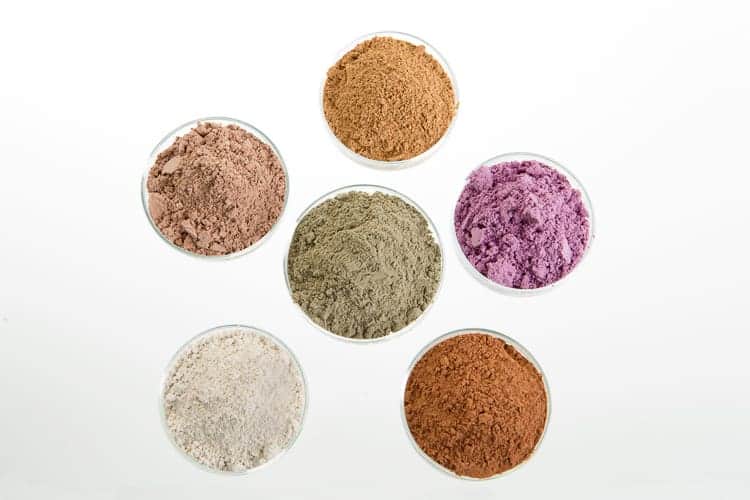
Natural Colorants for Homemade Costume Makeup
There are many “natural” colorants that can be used to add color to the main makeup base. Some of these colorants are more “natural” than others.
For this homemade costume makeup, I used a lot of the same colorants that I would normally use for making soap.
- Black: activated charcoal or black iron oxide
- White: titanium dioxide, zinc oxide, or kaolin clay
- Other colors: iron oxides, micas, colored clays, or spices
I don’t have a problem using iron oxides and micas, but some people avoid them because they want to use something 100% natural.
Are iron oxides and micas natural?
Iron oxides
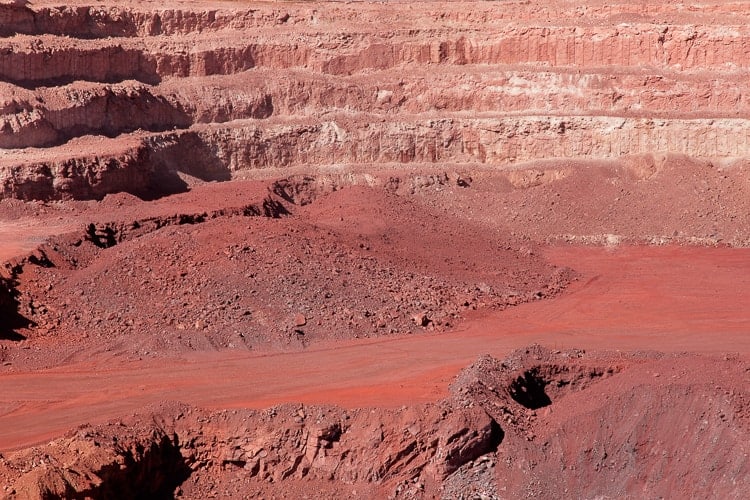
Iron oxides are minerals that are identical to those that can be found in nature. Those meant for cosmetic use are normally lab-created.
Naturally mined iron oxides aren’t normally used, nor are they allowed for cosmetics in the United States, because they can contain high levels of heavy metals which can be harmful to your health.
If you are taking the time to make your own homemade costume makeup to avoid the heavy metals in the commercial ones, it makes no sense to use iron oxides with heavy metals in them!
While I love using natural products, and normally prefer them, in the case of iron oxides, I prefer an oxide that has been synthesized in a lab to ensure its safety. (Make sure to choose cosmetic grade iron oxide.)
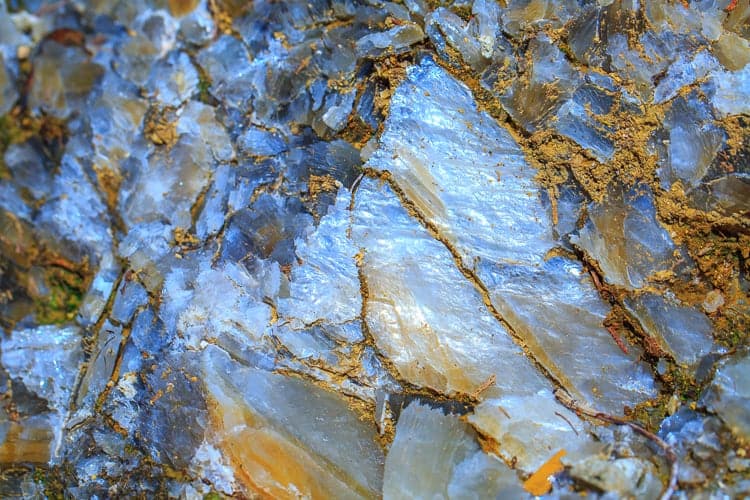
Micas
Micas are normally naturally mined and later coated with pigments. Depending upon the pigments used, some micas are more “natural” than others.
Truly natural colorants
If you’re really concerned about using truly “natural” colorants, there are some herbs and spices that can help color your homemade costume makeup.
Here is a list of some herbs that I think would make great colorants for homemade makeup. I would like to say that I haven’t had a chance to try them all out yet to see how smoothly they go on.
- Yellow: turmeric, yellow clay
- Brown: cocoa powder
- Black: activated carbon
- Red: alkanet root, paprika, or red clay
- Pink: Beetroot powder or pink clay
- Orange: powdered achiote or orange clay
- Green: spirulina, chlorella, or green clay
- Blue: blue clay or butterfly pea powder
Note: Clays do a good job of coloring the makeup smoothly, but may not provide a truly bright color without adding in other colorants.
For now, I have successfully used activated carbon, cocoa powder, colored clays, alkanet root, and achiote powder in homemade makeup. I have used some of the other natural colorants in other projects, though.
If you try more of them, I’d love to hear how it goes for you!
Lightening and darkening the pigments
Titanium oxide works well to lighten up colors but should be added little by little to avoid adding too much.
Some colors will lighten up as they solidify, so you may want to err on the side of making the colors too dark. they can always be re-melted and lightened up later on, but it’s hard to darken them once you’ve lightened too much.
Choosing your oils and waxes
Any liquid oil should make a homemade costume makeup stick with a similar consistency to the ones I made.
I used sunflower oil because it is an inexpensive, non-comedogenic oil that can be easily found even in supermarkets here. For somebody who has issues with acne, it makes a lot of sense to use a non-comedogenic oil.
No matter which oil you use, though, these makeup sticks won’t be fully non-comedogenic. Beeswax has a comedogenic rating of 2, meaning that it may cause breakouts for some people.
Candelilla wax only has a comedogenic rating of 1. It is very similar to beeswax in texture, so you can substitute the beeswax for candelilla wax to make a vegan, less comedogenic makeup.
Keep in mind that the colorants that you use may also affect the comedogenic rating of the final product.
Customizing the texture of your makeup
When formulating the recipe for this homemade costume makeup, I experimented with a lot of different ratios of oil to wax.
I assumed that using more oil would give a softer, easier to apply makeup. I found, though, that using too much oil just made the makeup greasier, less opaque, and not as long-lasting.
Too much wax, on the other hand, can make a solid makeup that is hard to apply. With beeswax and candelilla wax, I didn’t find it to be too much of a problem, but adding too much of a hard wax like carnauba wax can make the makeup brittle and almost impossible to apply.
- If you want to make a slightly softer or harder makeup, you can experiment with the ratios used.
- If you add more oils, you should also add more clay to help reduce the shininess and make the makeup more opaque.
- I found a 1:1 ratio of oil to wax to make a pretty good consistency
What is magnesium stearate?
Magnesium stearate is a somewhat controversial ingredient. It got a bad rap after being found in many, if not most, supplements.
Magnesium stearate is a white powder that helps “lubricate” machinery when making supplement pills to help make them run more quickly and smoothly. It also helps prevent the supplements from sticking together and from sticking to the machinery.
People debate whether or not ingesting magnesium stearate is harmful. Based on what I’ve read, though, as long as the quantities that you ingest are small (as is when used in supplements), it probably isn’t harmful.
In the case of magnesium stearate in makeup, though, larger amounts are used. On the other hand, they aren’t meant to be ingested.
Is Magnesium stearate safe in makeup? Why add it?
Magnesium stearate is often added to mineral makeups to help them go on more smoothly, to adhere to your skin for longer, and to absorb oils and shine, amongst other reasons.
- I added magnesium stearate to help the makeup flow more easily over the skin and have more staying power.
- It also helps absorb excess oils in the makeup and on the skin, making the final product more matte and less shiny.
I tried making several batches with and without the magnesium stearate, and I preferred the batches that used it. The makeup was easier to apply, had better and more opaque coverage, and theoretically may be longer-lasting, although I didn’t test that aspect out.
The EWG Skin Deep cosmetic database rates magnesium stearate as a 1, which is a low hazard rating for cosmetics. I feel that it is a safe ingredient and often use it in my homemade cosmetics.
Omitting magnesium stearate
If you prefer not to use it, though, you can definitely leave it out.
You may want to try substituting it with some more clay. You could also add a tad of titanium dioxide to help reduce shine and make the makeup more opaque. Keep in mind that titanium dioxide will also lighten your color, so add it slowly to make sure you aren’t lightening the color too much.
Choosing a container for your homemade costume makeup
I used empty chapstick tubes for storing and applying our DIY Halloween makeup. They’re a super inexpensive storage option that also happens to be great for easily applying the makeup. You can either reuse an old chapstick container, or you can buy them in bulk for super cheap.
Other ideas are using small tins or jars for applying the makeup with your hands or with a makeup brush.
You can also make pencils for drawing finer lines, but in the case of making homemade makeup pencils, you’ll probably need to add some carnauba wax to make a more solid pencil that can be sharpened without breaking.
I’ve been experimenting with making homemade eyebrow pencils and eyeliners and will try to share some of my more successful recipes with you soon. ?
Not just for Halloween makeup!
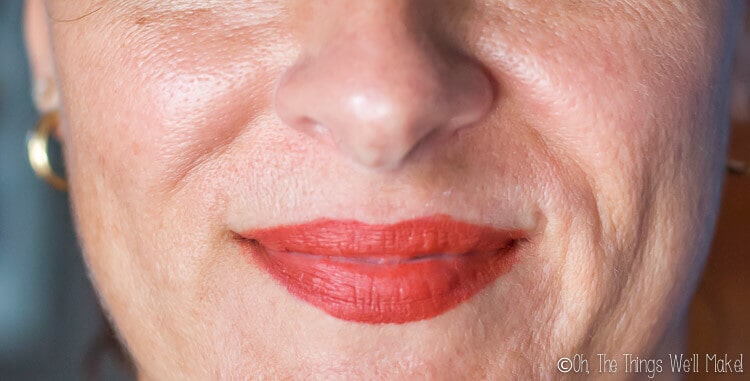
While I formulated this recipe to use as a homemade costume makeup, I found that it actually works quite well as a homemade lipstick, blush stick, and general cream makeup.
Now that you’ve learned how versatile it can be, are you ready to make some yourself?
By Tracy Ariza